Lumilor Day!
If you follow us on Facebook, you got the first look at our recent Lumilor day. If you missed it, don’t worry, you can catch all the details right here! But be sure to Like us on Facebook! so it doesn’t happen again… 😉
Yesterday we had a designated Lumilor day where we focused solely on a few light up paint jobs. We’ve got three projects we’re working on; a fully lit helmet, a simple flat panel, and a guitar.
Each of these projects were lit in the aqua LumiColor. The guitar will be getting a top coat paint job with some music note accents, while the flat panel is going to be used for a local artist who wants to experiment with her own top coat artwork. For now, we’re getting the Lumilor base sprayed on.
Let’s get started!
Electroluminescent paint consists of multiple layers of coatings that work together to produce the light. Our first video shows Tim spraying the first layer. It is a conductive layer.
One of the next layers is the dielectric layer, which will insulate the previous conductive layer.
Next, is our LumiColor layer. Lumilor is available in white, blue, aqua, green and orange. This layer is sprayed with black lights, so the human eye can see it.
The final layer of paint is the most fun because this is where we make it all light up! The very last layer is another conductive layer. We apply a conductive clear coat, and use a heat gun to dry it quickly, causing the coating layers to react to the electric current that is attached to it. The illumination is produced as the LumiColor layer is charged within the conductive layers we’ve sprayed.
Basically, the outer conductive layers allow the electricity to bounce between themselves while igniting the middle layers where the color lies. And when all this is connected to an electric current, it lights up and looks like this…
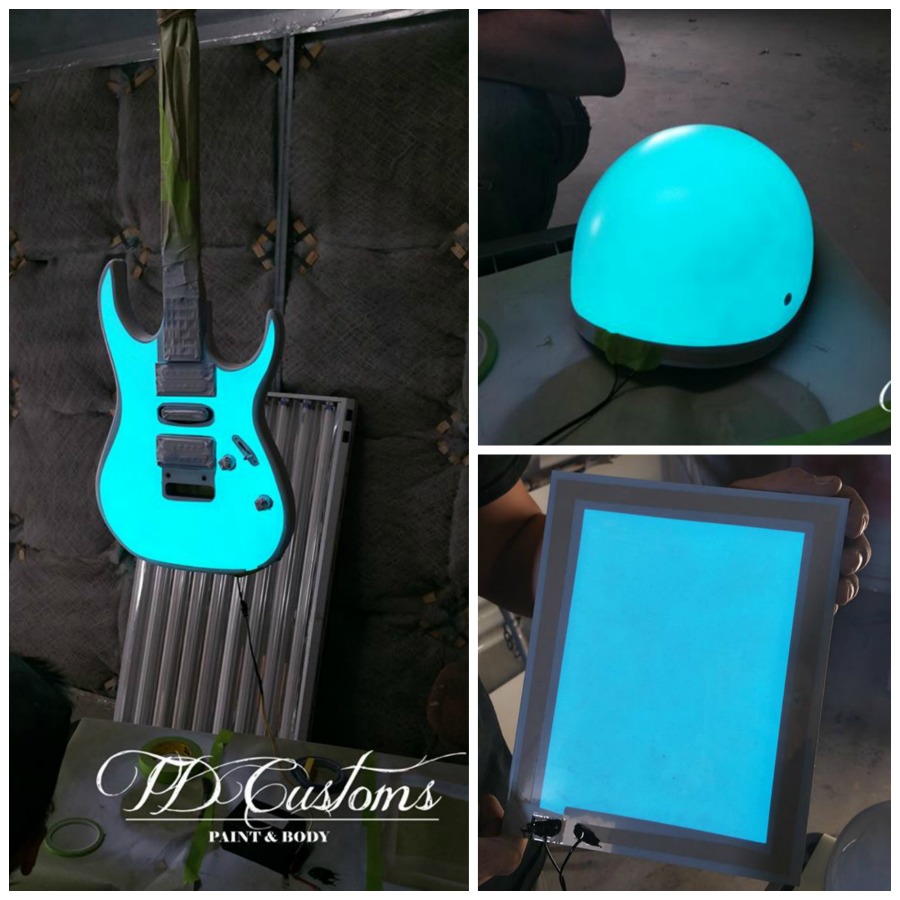
All three projects shown are fully lit with Lumilor electroluminescent paint in aqua, without any top coating at all. There are lots of different top coat options, which can show off the Lumilor in different ways. We’ll be top coating the guitar soon, so check back to see that. Or you know, Like us on Facebook!
What’s next?
Our next Lumilor day is going to be for Tim’s El Camino, which is getting a complete overhaul. The Lumilor application process is really complex, so we like to devote a day to it (rather than our typical auto body and restoration work) so we can concentrate and avoid distractions. The coatings also have to be mixed using a certain amount of materials, so we like to do a few jobs together so we cut down on the amount of wasted materials.
Lumilor day was really fun! Stay tuned, we’ll be posting more on these projects and others. What else can we light up? Leave us a comment!
See our Lumilor page for more information, or read through some FAQs for answers to our most common questions. If you’ve got an idea in mind that you’d like a quote for, contact us to discuss or fill out a Get Lit Request form and we’ll get back to you.
Got something to say?