Ruthy’s Restoration: Disassembly Continues
This Saturday, we had a family day at the shop working on Ruthy, a ’39 Chrysler Royal. We’re working on getting all the parts taken off the car, including the back fenders and the front grill, as well as taking off surface rust from the fenders and the floor of the car.
Disassembly is the messiest part of the restoration process. All of the parts need to be take off so they can be worked on individually. We took off the back fenders, which took a little work getting the bolts loose. We were pleasantly surprised at how easy many of the bolts came out on the car, but some of them did give us trouble and had to be cut out with a grinder.
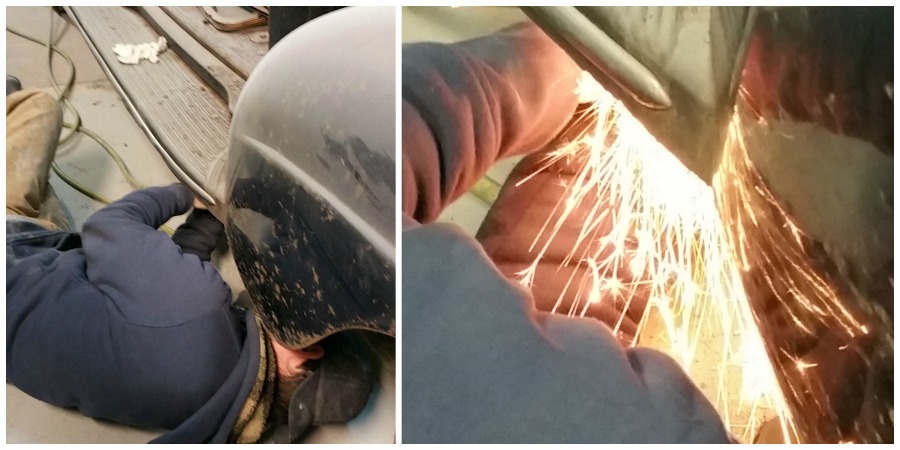
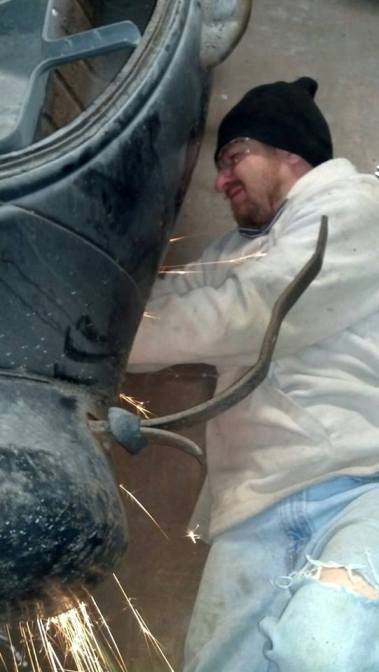
Taking off the rust involves sanding or scraping out all the parts that are covered with surface rust. Ruthy is in very good shape as far as rust. If it’s able to scrapped off, then we know the damage isn’t that bad. We took the back fenders off of the car and scrapped out all rust, and then painted a coat of POR-15 to the insides. This will prevent rust from coming back.
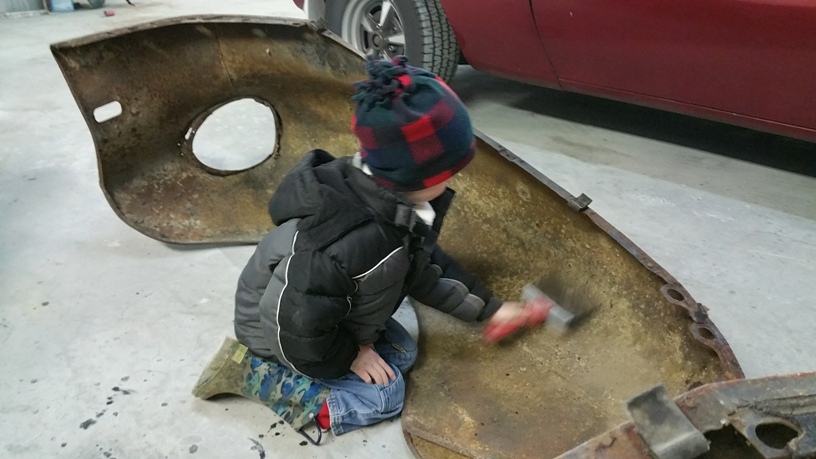
Ethan scraping off rust
After scrapping out all the rust, it was time for the messy job of applying the rust prevention POR-15 to the inner fenders. Ethan was a big help!

Ethan and Tara painting POR. He’s a pro!
Here is the Before & After pics of what the inner fenders look like:
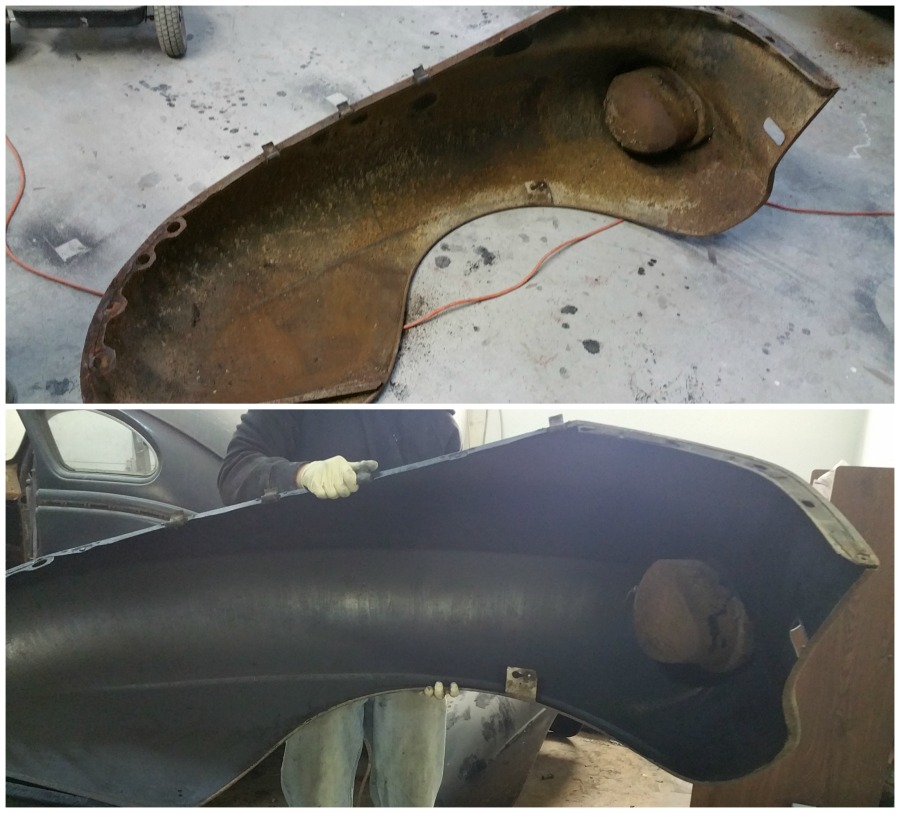
Before & After: Rust removal and POR application on inner fenders
We also worked on the floor of the car, scraping out surface rust and getting it ready for other repairs later on, such as patching in new floor pan pieces in as needed.

Julie and Ethan tackling rust on the floorpans
Here’s what it looks like all cleaned out…
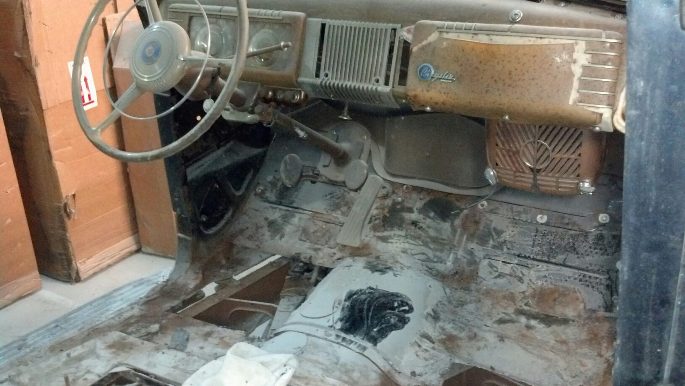
Floor all cleaned out
As we disassemble the parts, Tim is able to get an idea of what kind of work will be needed on each area of the car. The fenders, for example, needed the insides taken care of and protected from rust. The floor pan rust will need to be patched up.
And here is what Ruthy looks like now after our latest family work day…
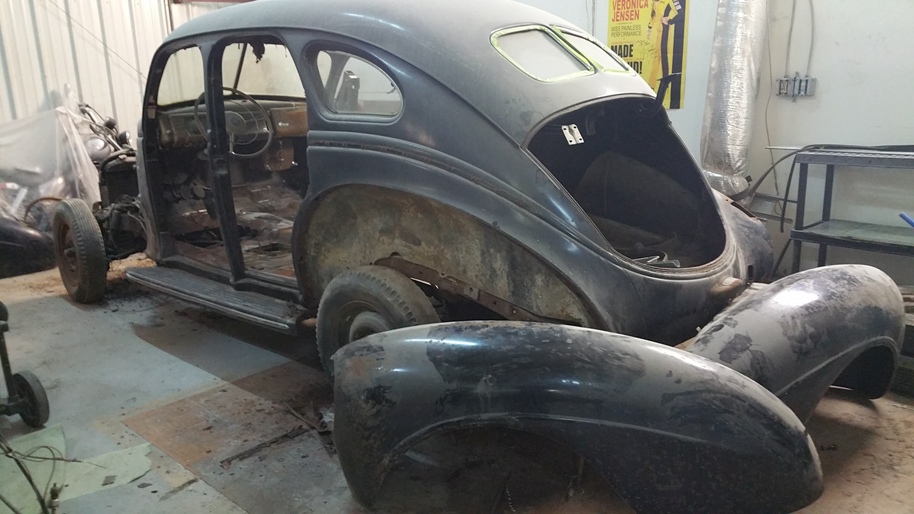
Ruthy: After disassembly
Most of the parts have been taken off. She needs a good cleaning, and to get all debris out from the insides. Once these first few days of disassembly and cleaning her up are over, we’ll get into some real body work.
The next steps on Ruthy’s restoration are going to be to clean out the entire car, scrap and sand out any rust, etc., and then remove the body and the chassis so we can sandblast the chassis and start to run fuel lines, brake lines, and new electrical. More updates to come.
Ruthy’s restoration is a true work of love for Tim’s grandmother, Pat. This ’39 Chrysler was her first car. It’s been in storage for about 60 years, but is now getting some well-deserved attention, as her family works to restore her back to her original state. We’re slowly but surely making progress on her!
To keep up with Ruthy’s Restoration, follow the blog for updates!
[Subscribe button on right sidebar —>]
See our Restoration page for more on our restoration services, and feel free to contact us with any questions or to discuss your project with us!
Julie
February 10, 2016 (4:10 am)
Tara thank you for capturing this. I love making these memories and caring for Ruthy.
TD Customs
February 10, 2016 (3:54 pm)
It’ll be great to look back on the entire project when it’s all done!